如何实现多个电机自动调度?
注:本文默认电机连接是使用断路器、接触器实现的直接启动电路,对于变频器类的控制需要做一些配置才能使用。
控制要求如下:
可设置每个电机的额定运行时间,当电机的实际运行时间大于额定运行时间时,则自动关闭并调度下一台可用电机;
当电机出现故障(比如断路器跳闸或超时无反馈),则电机状态变为不可用。不可用电机不参加调度;
当故障消除并复位后,电机状态重新变为可用,可重新参加调度;
具体如下:
打开博途开发环境,新建项目,添加用户自定义数据类型:typeMotorSchedule,如下图所示:
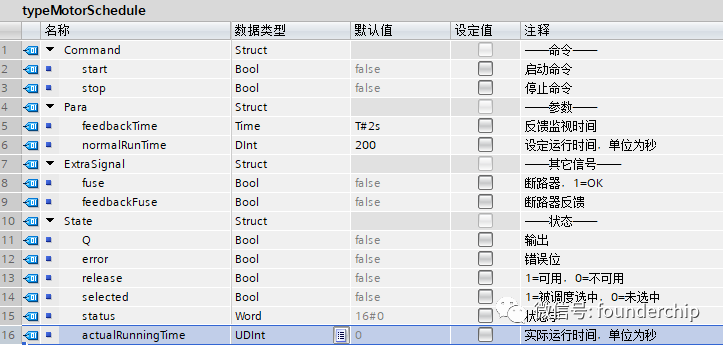
其中:
Command:包括启动(start)和停止(stop),用来启动或停止电机;
Para:电机控制参数,包括反馈时间和额定运行时间,单位,秒;
ExtraSignal:外部信号,包括断路器和接触器反馈;
State:状态,包括:输出位(Q)、错误位(error)、释放(release,表示电机是否可用)、选中(selected,表示电机是否被选中)、状态(status,电机状态,非0等于出错)、实际运行时间(actualRunningTime,单位,秒);
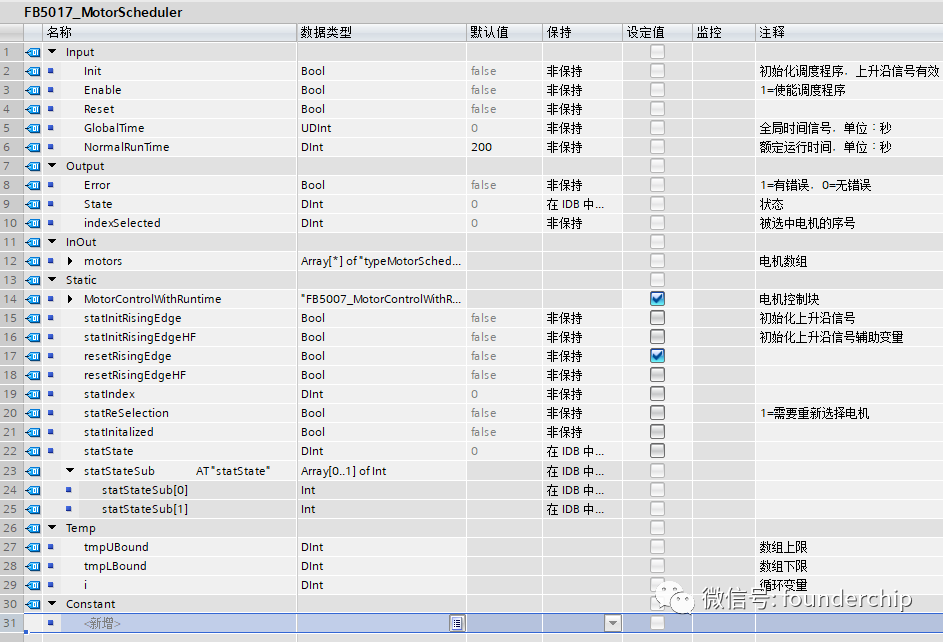
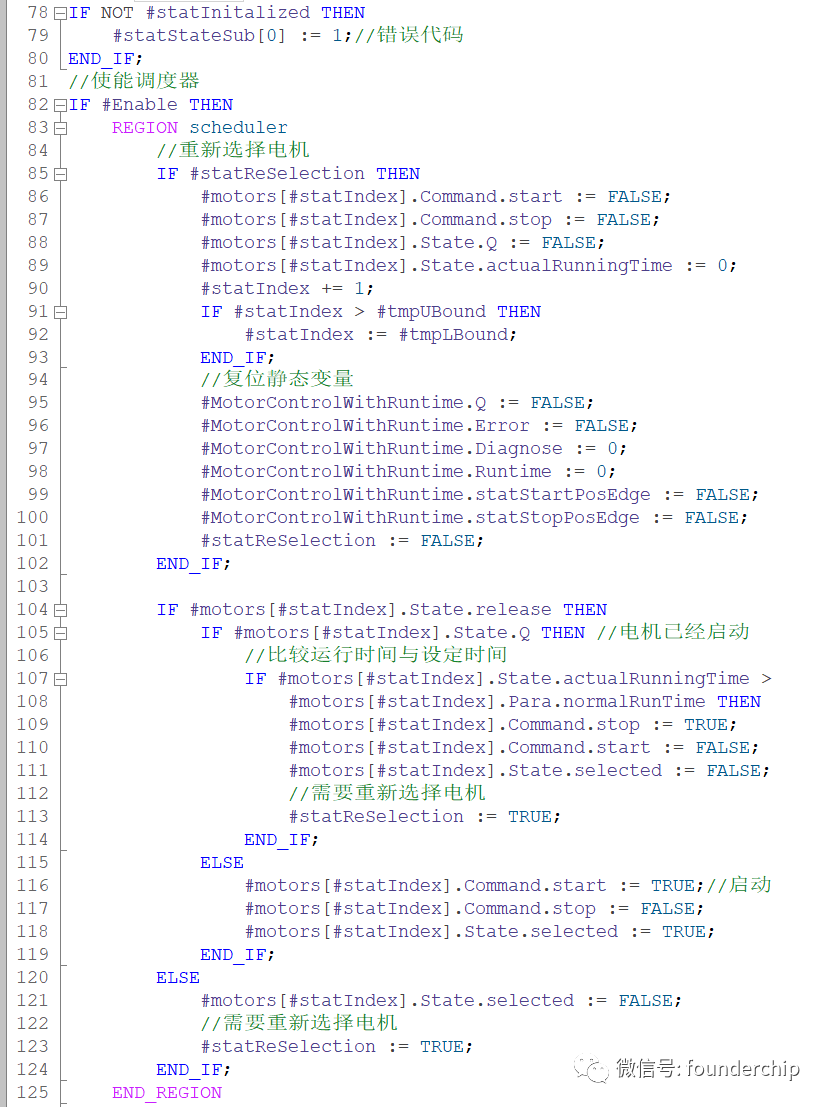
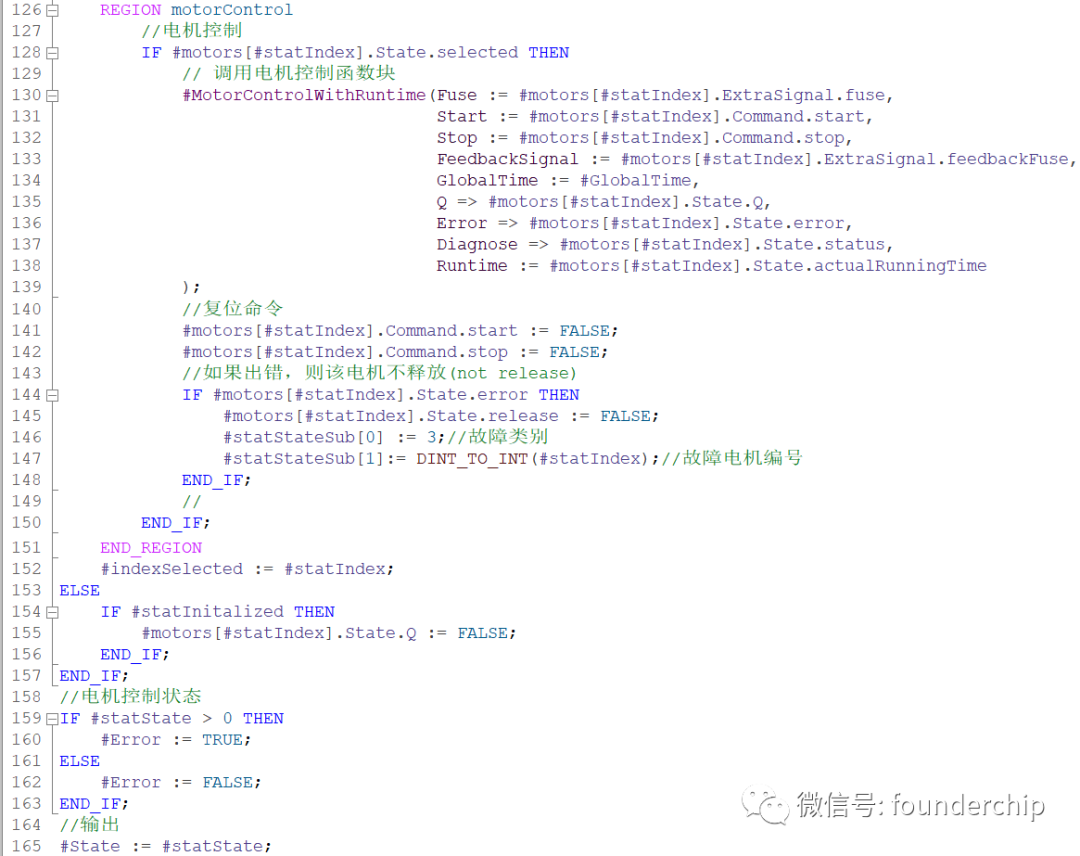
添加函数块,命名为:FB5017_MotorScheduler,声明变量如下图所示:
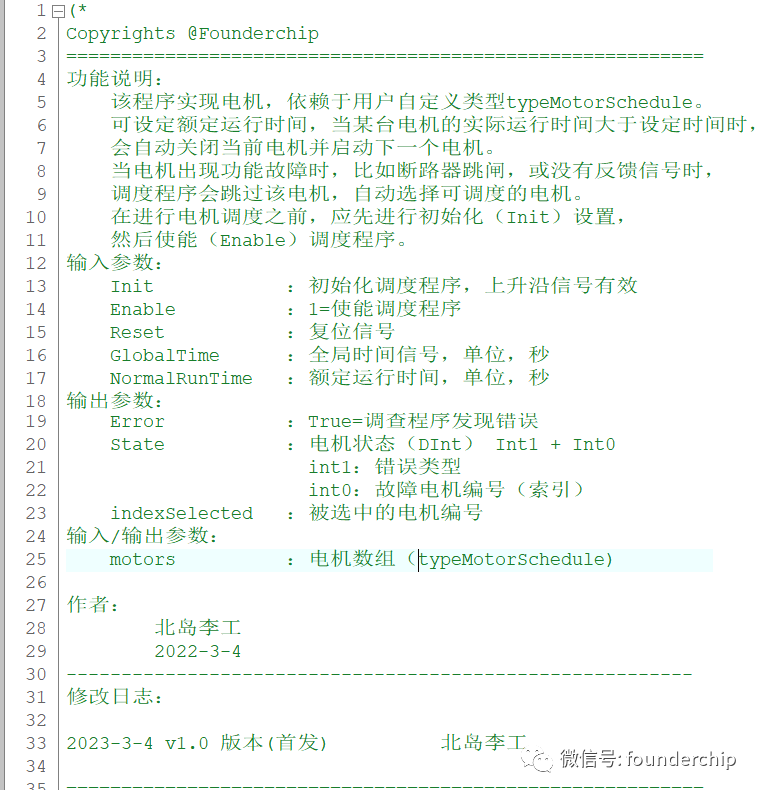
函数块代码比较长,我将其分成多个区域:
功能说明;
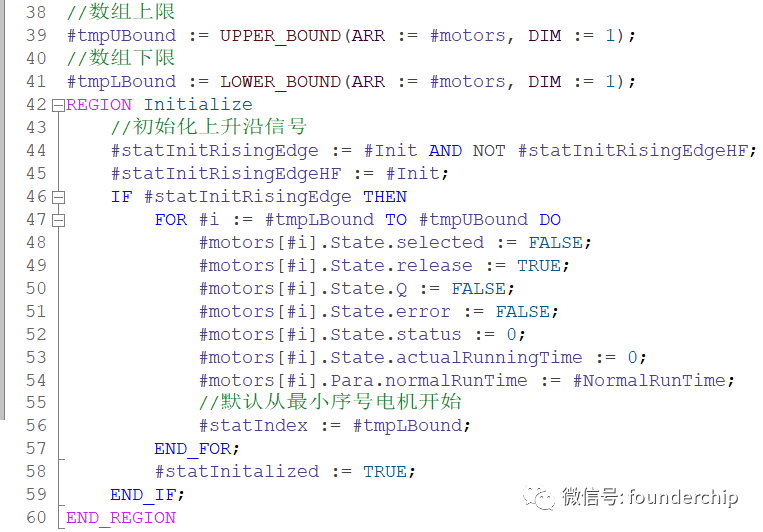
初始化(initialize);
复位(reset);
调度(sheduler);
具体如下:
功能说明:
初始化:
复位:

调度:
使用该函数块时需要先初始化,然后使能。当出现错误时,要进行复位。
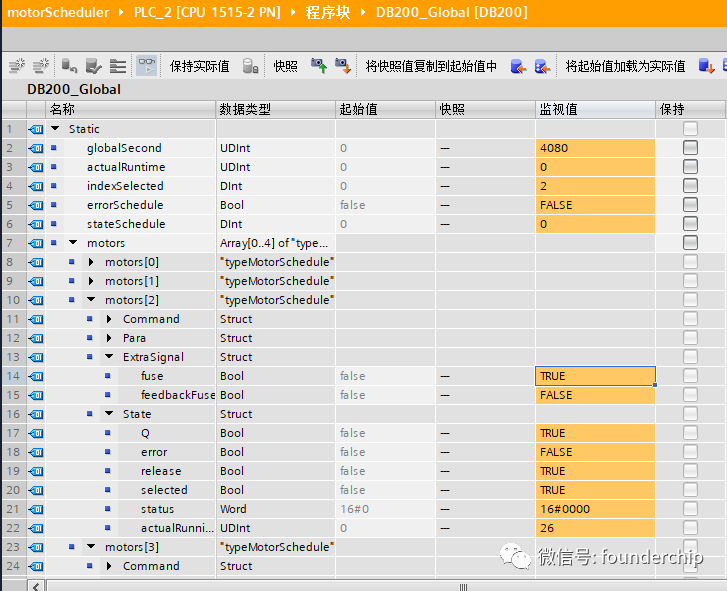
可以在全局数据块中创建电机数组(typeMotorSchedule),然后将断路器、接触器的信号写入电机数组的ExtraSignal中,并将电机状态State.Q输出到硬件的输出通道中。
我创建了测试函数块及全局数据块对电机调度程序进行了测试,包括断路器的错误测试,结果是OK的。
本站所有转载文章系出于传递更多信息之目的,且明确注明来源,不希望被转载的媒体或个人可与我们联系,我们将立即进行删除处理。